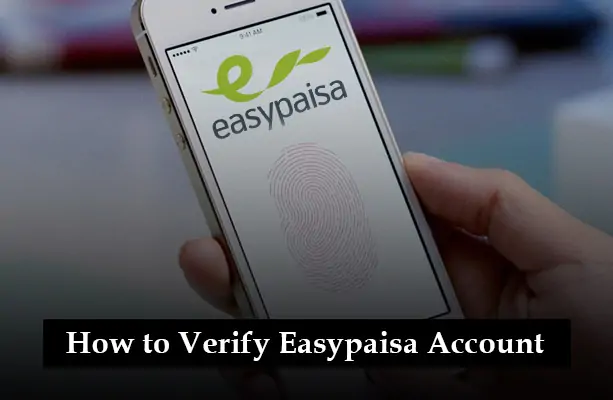
Easypaisa is one of Pakistan’s leading mobile wallet services, providing users with a fast, secure, and convenient way to manage their financial transactions. Whether you’re paying utility bills, transferring money, shopping online, or receiving remittances, Easypaisa has become an essential part of everyday life for millions.
However, to unlock the full range of features and ensure your account is secure, verifying your Easypaisa account is crucial. A verified account provides higher transaction limits, improved access to services, and protection against fraud and misuse.
Why Verifying Your Easypaisa Account Matters
Verifying your Easypaisa account is more than just a formality—it’s a gateway to unlocking the complete power of the app. Once your account is verified, you gain access to features and financial flexibility that unverified users can’t enjoy.
- Increased Transaction Limits: A verified account allows you to send and receive larger amounts of money, making it ideal for business use, family support, or frequent transactions.
- Access to Full Features: From bank transfers and receiving international remittances to paying utility bills and purchasing online, a verified status gives you full control over all available Easypaisa services.
- Enhanced Security: Verification ensures that your account is protected with biometric authentication and linked securely to your CNIC, reducing the risk of fraud and unauthorized access.
- Compliance with Regulations: Easypaisa must adhere to strict financial regulations. That means account verification is mandatory if you want to send or receive higher amounts or use cross-border services, such as international remittances.
Requirements for Easypaisa Account Verification
Before you can verify your Easypaisa account, it’s essential to ensure that you have all the necessary documents and details ready. The verification process is designed to confirm your identity and link your account to your official records. Here’s what you’ll need:
- Valid CNIC (Computerized National Identity Card):
Your original CNIC is required for identity verification. Ensure it is not expired and the details are visible.
- Active Mobile Number Registered Under Your CNIC:
The SIM card you’re using must be registered in your name, as per the NADRA database. This ensures that the account belongs to the rightful owner.
- Biometric Verification:
You’ll need to complete a one-time biometric verification, which can be done by visiting an authorized Easypaisa retailer, a Telenor franchise, or a NADRA e-Sahulat center. This step is crucial for confirming your identity and securing your account against unauthorized use.
How to Verify Easypaisa Account via App
Easypaisa makes it simple to start the verification process right from your smartphone. If you have the Easypaisa app installed, you can initiate verification in just a few taps. Here’s how to do it:
- Open the Easypaisa App and Log In:
Launch the app on your mobile phone and enter your PIN or use biometric login to access your account.
- Tap on Profile or Settings:
On the home screen, locate the profile icon or settings option—usually found in the top-right corner.
- Select “Verify Account” or “Complete Registration”:
In your profile menu, tap the option labelled “Verify Account” or “Complete Registration.” This will open the verification form.
- Enter Your CNIC Details:
Please provide your 13-digit CNIC number and confirm any other required personal details, such as your date of birth or issue date.
- Complete Biometric Verification:
You’ll be prompted to either:
- Visit the nearest Easypaisa retailer or franchise for fingerprint scanning, OR
- Use the in-app NADRA biometric service if your device supports it and the option is available in your area.
- Visit the nearest Easypaisa retailer or franchise for fingerprint scanning, OR
How to Verify Easypaisa Account via Franchise or Retailer
If you prefer an in-person method or don’t have access to the Easypaisa app, you can easily verify your account by visiting an authorized location. This process is straightforward and takes just a few minutes:
- Visit the Nearest Easypaisa Franchise or Telenor Retailer:
Locate an official Easypaisa service point in your area. Most Telenor franchises and Easypaisa agents offer account verification services.
- Provide Your CNIC and Mobile Number:
Share your original CNIC and the mobile number associated with your Easypaisa account. Ensure both are registered under your name.
- Complete Biometric Verification:
The retailer will scan your fingerprints using a biometric device to match your identity with NADRA’s records.
- Receive Confirmation SMS:
Once your biometric data is successfully verified, you’ll receive a confirmation text from Easypaisa stating that your account is now verified.
How to Check Verification Status
Once you’ve completed the verification steps, you might want to confirm whether your Easypaisa account is officially verified. Here are two simple ways to check your verification status:
- Via Easypaisa App:
Open the Easypaisa app on your phone, log in, and go to your profile or settings section. There, you’ll see your account status displayed—either as Verified or Unverified. This status confirms whether your verification process is complete.
- Using USSD Code:
If you don’t have access to the app, dial *786# from your Easypaisa-registered number.
→ Navigate to “Account Info”
→ Then select “Verification Status”
Your current status will be displayed on the screen.
Tips for a Smooth Verification
To avoid delays or errors during the Easypaisa account verification process, follow these helpful tips to ensure everything goes smoothly on the first try:
- Make Sure the SIM Is Registered in Your Name:
Easypaisa only allows account verification if the mobile number is officially linked to your CNIC. You can check your SIM registration status using the PTA SIM check service. - Double-Check CNIC Validity and Spelling:
Ensure your CNIC is not expired and all personal details you enter match exactly with your NADRA records. Even minor spelling mistakes can cause verification issues. - Avoid Creating Multiple Accounts Under One CNIC:
If you already have an Easypaisa account linked to your CNIC, trying to verify a second one can lead to rejection. Stick to a single verified account for full access and compliance.
Conclusion
Verifying your Easypaisa account is a straightforward process, but attention to detail is key. By following the steps outlined above, you can enjoy a seamless, secure, and enhanced Easypaisa experience. Dive into the world of digital transactions with confidence, knowing your account is verified and ready to go!
Frequently Asked Questions
Can I verify Easypaisa without visiting a retailer?
Yes, if your mobile and device support it, you can complete the verification through the Easypaisa app using the in-app NADRA biometric feature. However, in most cases, a visit to an Easypaisa retailer or franchise is required for fingerprint verification.
How long does verification take?
Once your biometric verification is complete, your Easypaisa account is usually verified within a few minutes to a few hours. In some cases, it may take up to 24 hours, depending on system response times.
Is biometric verification mandatory?
Yes, biometric verification is mandatory for full account activation. It ensures your identity is securely matched with NADRA records and helps prevent fraud.
Can I use Easypaisa without verification?
Yes, but with limited functionality. Unverified users can perform basic transactions, such as mobile top-ups or limited fund transfers. However, to access full services such as bank transfers and receiving large payments, verification is required.
Can I verify an account if the SIM isn’t registered in my name?
No, the SIM used for the Easypaisa account must be registered under your own CNIC. Easypaisa uses this data to confirm your identity, and mismatches will prevent verification.
Verification
Nadra verification