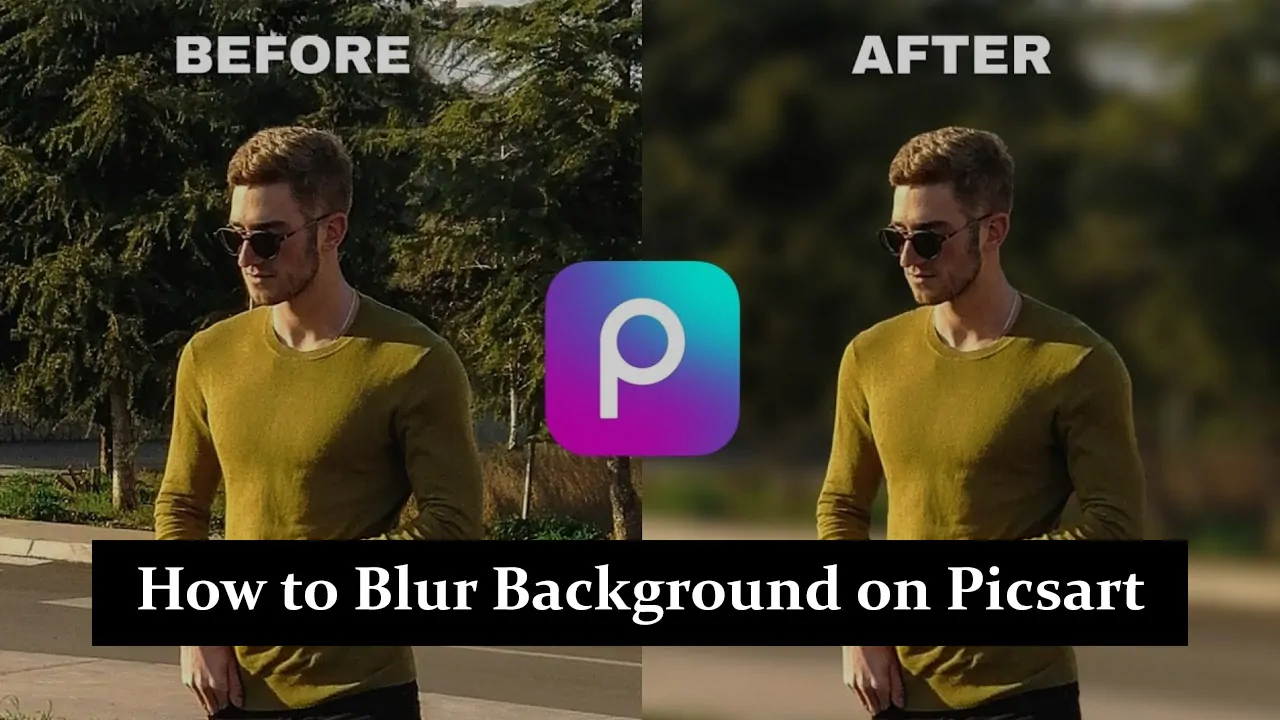
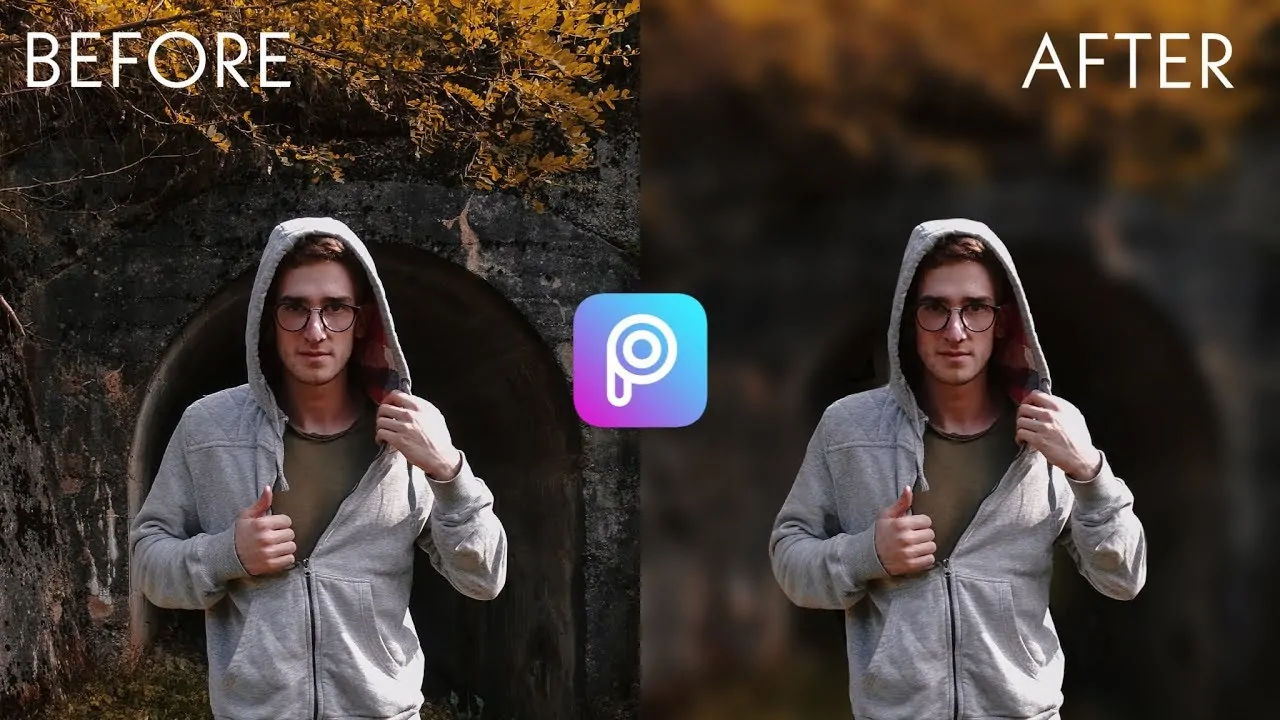
Picsart is a popular photo editing app that millions love for its easy-to-use tools and creative options. One of the most useful features in Picsart is the blur effect, which can make your photos look more professional by softening backgrounds or highlighting specific details. Whether you’re creating stunning portraits or artistic edits, the blur effect adds a touch of creativity that makes your images stand out. In this guide, we’ll show you how to use the blur effect in Picsart to take your photo editing to the next level.
What is the Blur Effect?
Blur Effect Overview: The blur effect softens or obscures parts of an image, creating a dreamy, out-of-focus appearance.
Highlighting with Blur: This technique is often used to draw attention to a subject by blurring the background or adding an artistic touch to the photo.
Types of Blur in Picsart:
- Motion Blur: Creates the illusion of movement, ideal for action shots.
- Radial Blur: Adds a circular blur around a focal point, enhancing depth and focus.
Creative Exploration: PicsArt’s blur options allow for experimentation, helping you enhance your photos with creative effects.
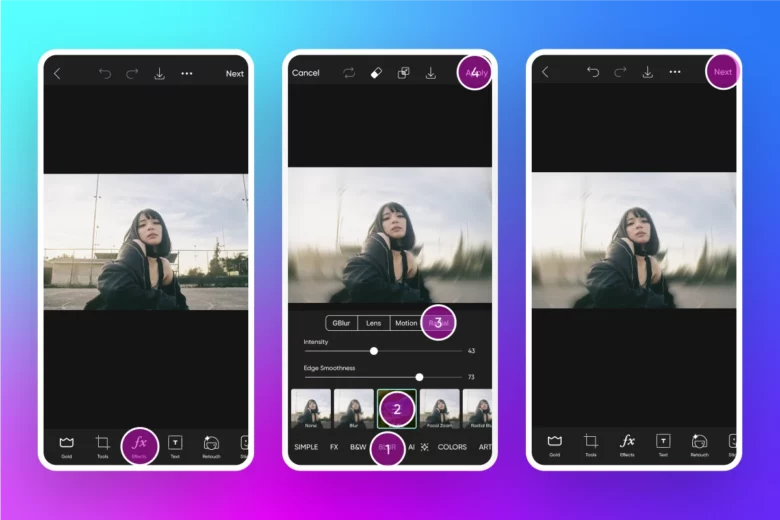
How to Blur a Photo on Picsart
- Step 1: Open the Picsart App
- Step 2: Upload or Select an Image
- Upload a new image or select one from your gallery.
- Picsart provides easy access to your photos.
- Step 3: Navigate to the Blur Tool
- Find the blur tool among the editing options.
- Explore different blur effects like Gaussian and motion blur.
- Step 4: Apply the Blur Effect
- Choose a blur effect and apply it to your image.
- Adjust the blur intensity to achieve the desired look.
- Step 5: Customize the Blur
- Use the eraser or brush tool to blur specific parts of the image selectively.
- Highlight or hide areas as needed for a professional touch.
- Step 6: Save and Share Your Edited Image
- Save the edited image in high quality.
- Share directly to social media or export it to your device.
Advanced Tips for Using Blur in Picsart
- Combine Blur with Filters or Overlays: Apply a blur effect to the background and enhance it with filters or overlays for a unique, artistic look.
- Enhance Portraits: Use blur to soften the background in portraits, making the subject stand out while adding a professional touch.
- Creative Landscape Photography: Blur specific areas in landscape photos to highlight key elements like a person or a landmark, drawing the viewer’s eye to the focal point.
- Experiment with Intensity: Adjust the blur intensity to achieve the desired effect, whether it’s a subtle background blur or a more dramatic, artistic effect.
- Layer Multiple Effects: Layer blur with other effects, such as vignettes or brightness adjustments, to create a more dynamic and visually appealing image.
Common Mistakes to Avoid When Blurring Photos
When blurring photos, it’s easy to make mistakes that can affect the overall quality of your image. Here are some common mistakes to avoid:
- Over-Blurring or Under-Blurring: Applying too much blur can make your photo look unrealistic, while too little blur might not achieve the desired effect. Find the right balance to enhance your image naturally.
- Misusing Selective Blur: Incorrectly applying selective blur can lead to unnatural transitions between sharp and blurred areas, making the photo look unprofessional.
- Ignoring Photo Quality: Overusing blur can degrade the image quality, making it appear pixelated or fuzzy. Always check the resolution and clarity after applying blur.
- Not Considering the Subject: Ensure the blur complements the main subject of the photo rather than distracting from it.
- Forgetting to Adjust Other Settings: Sometimes, a subtle blur is all you need, but you might also want to tweak brightness, contrast, or saturation to maintain a cohesive look.
Conclusion
Blurring a photo in Picsart is a simple yet powerful way to enhance your images. Start by selecting the blur tool, adjusting the intensity, and applying it to the desired areas of your photo. Don’t hesitate to experiment with different blur levels to achieve the perfect effect for each image. Whether aiming for a subtle background blur or a more artistic touch, the key is to practice and find what works best for your style. We’d love to see your creative results or hear any questions you have, so feel free to share them in the comments!