The internet is evolving, and so are the technologies behind it. One major shift happening quietly in the background is the transition from IPv4 to IPv6. But what exactly is IPv6? Simply put, IPv6 (Internet Protocol version 6) is the latest version of the IP addressing system, enabling your Android phone to communicate with websites and other devices online. Unlike the older IPv4 system, which is running out of usable addresses, IPv6 offers a nearly unlimited supply—enough to assign a unique address to every device on Earth and beyond.
For Android users, enabling IPv6 isn’t just a tech-savvy move—it can enhance your mobile experience. With IPv6, you may notice faster loading times, better app connectivity, and improved performance over modern 4G and 5G networks. It also prepares your device for future technologies that rely heavily on next-gen internet protocols.
IPv4 has served us well for decades, but it’s becoming outdated in a world full of smartphones, smart TVs, and Internet of Things (IoT) gadgets. IPv6 is designed to meet the demands of this connected future, and enabling it on your Android device is a smart step forward.
Why IPv6 Matters on Mobile
As mobile internet use continues to rise, the demand for faster, more efficient connectivity is more important than ever. That’s where IPv6 comes in. For Android users, enabling IPv6 can result in noticeably smoother performance in data-intensive applications, such as video streaming, online gaming, and cloud-based services. Because IPv6 routes data more directly and efficiently than IPv4, it can reduce latency and improve overall browsing speed.
Beyond speed, IPv6 is a critical piece of the future Internet puzzle. IPv4 addresses are almost entirely used up, and while workarounds like Network Address Translation (NAT) have helped extend their lifespan, they’re not a long-term solution. IPv6 provides a vast pool of addresses, ensuring every smartphone, smartwatch, and smart home device can connect without limitations.
Modern mobile networks, such as 4G and 5G, are designed with IPv6 in mind. These newer infrastructures support IPv6 natively, which means enabling it on your Android phone allows you to fully benefit from the speed, stability, and security improvements built into today’s wireless technologies.
Check If Your Android Device Supports IPv6
Before enabling IPv6, it’s essential to verify whether your Android phone supports it. While most modern smartphones do, some older or budget models may lack this feature or require specific carrier support to activate it.
To check IPv6 compatibility on your Android device:
- Open the Settings app.
- Tap on “Network & Internet,” then select “Mobile Network.”
- Scroll down and select Access Point Names (APN).
- Tap on your currently active APN. If you’re not sure which one is in use, your carrier’s name usually appears next to it.
- In the APN settings, look for the APN Protocol option.
- If you see choices like IPv4, IPv6, or IPv4/IPv6, your phone supports IPv6.
If these options are missing, your device may not support IPv6 natively, or your mobile carrier may not have enabled it on their end. In such cases, contacting your service provider for more information or updating your phone’s firmware may help.
Step-by-Step Guide to Enabling IPv6 on Android Devices
Step 1: Checking Your Current IP Version
Before changing to IPv6, verifying your current IP version is beneficial. Various online IP checker tools can display your IP version when accessed from your device’s browser. These straightforward tools provide the needed information instantly upon opening the site.
Step 2: Enabling Developer Options on Android
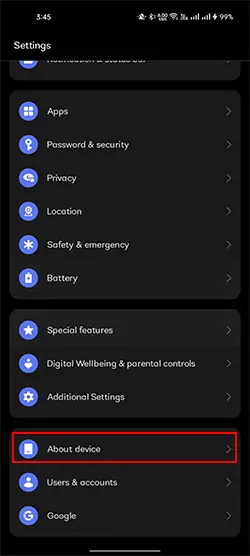
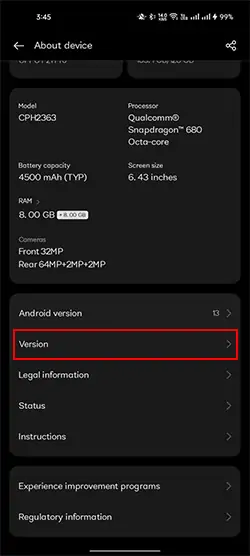
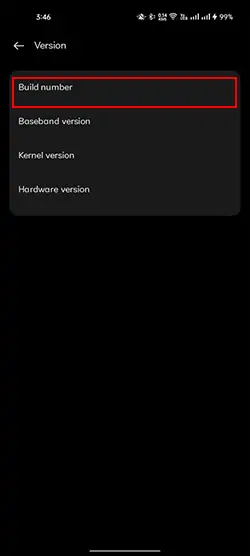
Accessing the IPv6 settings on Android requires enabling Developer options. This process involves opening the Settings application on your Android device and selecting the ‘About phone’ option. Subsequently, navigate to ‘Software information’ and tap the ‘Build number’ seven times. A message will appear confirming the activation of Developer options.
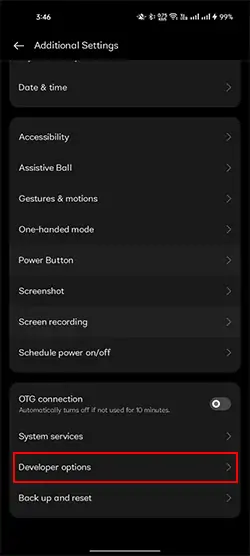

C. Step 3: Accessing the Networking Settings
Having enabled Developer options, return to the main Settings menu. Scroll down to find ‘Developer options’ and tap it to open. Within these options, scroll until you find the networking settings.
Step 4: Changing the IP Version to IPv6
Within networking settings, find the option labeled ‘Select IP version.’ Upon tapping this option, select IPv6 from the ensuing options. This action initiates the process of transitioning your device to IPv6.
Step 5: Checking that IPv6 has been Successfully Enabled
You can validate the successful change to IPv6 by revisiting the IP checker website. If the transition is successful, the site will display your new IP version as IPv6.
Troubleshooting IPv6 Issues
Enabling IPv6 usually goes smoothly, but a few common hiccups can prevent it from working as expected. If you’ve followed the steps and run into connectivity issues, here’s how to fix them:
- No internet after enabling IPv6?
Some networks don’t yet fully support pure IPv6 connections. If selecting IPv6 causes a loss of connectivity, return to your APN settings and choose IPv4/IPv6 instead. This dual-stack option offers better compatibility while still enabling IPv6 features. - APN settings not saving changes?
If your device won’t save the modified APN or reverts to default values, your mobile carrier may have locked APN editing. In this case, contact your provider and ask if custom APN changes are supported, or if they offer an official IPv6-enabled APN. - Wi-Fi networks not showing IPv6 support?
Enabling IPv6 on mobile data doesn’t affect your Wi-Fi connection. If you’re trying to use IPv6 over Wi-Fi and it’s not working, your home router might need to have IPv6 manually enabled. Check your router’s admin panel, which is usually accessible via a web browser, and look for IPv6 settings.
IPv6 Security and Privacy Tips
While IPv6 offers numerous benefits in terms of speed and connectivity, it’s also crucial to understand its implications for privacy and security. Unlike IPv4, which often hides multiple devices behind a single public IP (thanks to NAT), IPv6 assigns a unique address to every device, making it easier for websites and third parties to track your activity across sessions.
To stay protected while using IPv6 on Android, consider the following tips:
- Be aware of device exposure.
Because each device has its own globally routable IP, it becomes easier for websites to link browsing activity directly to your phone. This makes it more important to manage privacy settings in your browser and apps. - Use secure DNS services.
Opt for DNS providers that offer encrypted lookups, such as DNS over HTTPS (DoH) or DNS over TLS (DoT). These prevent third parties from seeing which websites you’re visiting, even if you’re using IPv6. - Choose VPNs that support IPv6.
Not all VPNs handle IPv6 traffic properly. Ensure your VPN provides full IPv6 compatibility to prevent leaks, especially when privacy is a top priority. Without this, your real IP might be exposed even when using a VPN.
Conclusion
IPv6 is a faster, more efficient, and future-ready Internet protocol designed to replace the ageing IPv4 system. Enabling IPv6 on your Android device can improve connectivity, reduce latency, and prepare your phone for the growing demands of modern apps and networks. However, it’s essential to verify that both your mobile carrier and device support IPv6 before making the switch. Using the dual-stack option (IPv4/IPv6) is usually the safest choice for compatibility. To get the most out of IPv6, always keep your Android system and firmware up to date. If supported, enabling IPv6 is a smart step toward a better mobile internet experience.
Frequently Asked Questions
Does IPv6 use more battery?
No, IPv6 does not consume more battery than IPv4. It functions similarly in terms of power usage, so enabling it won’t noticeably affect your device’s battery life.
Is IPv6 faster than IPv4 on all networks?
Not always. IPv6 can offer better performance on networks that are optimized for it, but in some cases, IPv4 may still be faster depending on your ISP, carrier infrastructure, and app compatibility.
Can I use IPv6 with Wi-Fi only?
Yes, IPv6 can work over Wi-Fi if your router and internet service provider (ISP) support it. You may need to enable IPv6 manually in your router settings for it to work.
What if my phone doesn't show IPv6?
If your phone doesn’t display IPv6 settings, it could be due to an older Android version, limited carrier support, or a locked APN configuration. Contact your mobile provider or update your phone’s software for potential IPv6 access.